How to Add Recent Posts Widget to Blogger

Widget to Blogger(blogspot) blogs using Feedburner's BuzzBoost service.

Do the following steps:

  1. Sign-in to your feedburner account and select your blog from My Feeds:
    How to Add Recent Posts Widget to Blogger

  2. Click Publicize tab from the top menu:
    How to Add Recent Posts Widget to Blogger

  3. Then select BuzzBoost from the left sidebar:
    How to Add Recent Posts Widget to Blogger

  4. Next you have to chose the number of recent posts you want to show, then select the optional items from the list and click Save:
    How to Add Recent Posts Widget to Blogger

  5. Now you have to Select the widget code from the top box and Copy it:
    How to Add Recent Posts Widget to Blogger

  6. Then go to Blogger Layout Page - click Add a Page Element/Add a Gadget - select HTML/Javascript - then Paste the code and click Save. Finished!


You will see your Recent Posts Widget according to your Template's design and color! Happy Blogging!2 Thumbs Up

Drop Comments!
Read rest of entry

making dropdown menu for blogspot

A blog reader asked (desperate) for a way to create a pull down menu for his posts of recipes. I have got good and bad news for him. The good news is that there is a simple way to get a drop-down menu. Use Drop-down Menu Generator, which I used to generate a script to paste into a HTML/Javascript Page Element. The bad news for me is that the width of the drop down menu is dependent on the description (post title or anchor text) you put for the link to the post. I used it to do a drop-down menu for the posts in this blog: Food, Drinks and Recipe. It is at the top of the main column and will be displayed in the main page as well as the individual post pages (permalinks). I had originally planed to put it in the sidebar, but because the post titles were long, the width of the drop-down menu generated was too wide for the sidebar, so I had to put it above the main column. If you want something similar, you will need to know how to add an extra "Add a Page Element" for the main column.

The bad news for him is that there is only a limited number of posts he can put in the drop-down menu, and I doubt that would be sufficient for his long list of recipes. However, I suppose this drop-down menu can still be useful for making drop-down menus like for blogs, etc.

If he is still interested in doing it, this is how to proceed to generate the drop-down menu. For this task, it will be helpful to use a browser like FireFox which have tabbed browsing. In one tab, log into the Blogger account and click "POSTS" for the relevant blog. A page with with a list of posts will appear. Right click on "VIEW" on one of the post and select "Copy Shortcut" to copy the post URL into the clipboard.

Blogger Dashboard with list of posts of a blog

Open another tab and surf over to Drop-down Menu Generator. Paste the URL into the "Link URL" field. Then type the title of the post into the field for "Text shown". Continue the same process until you have entered all the post you want to appear in the drop-down menu, or you run out of fields to paste the Link URL.

Drop-down menu generator

Click on "Generate" and the script will be generated into the window below. Highlight all the script, copy into clipboard, then in the tab for the Blogger account, paste it into a HTML/Javascript "Add a Page Element" window and save.
Read rest of entry

Change background color of New Blogger sidebar

A blogger commented that he could not find the sidebar color code in the template to change the background color of the sidebar. The CSS (Cascading Style Sheet) of every template is written different and if something is missing, all you need to do is to add the relevant missing part in.

For example, in the standard Blogger Scribe template, this is the section in the CSS (Cascading Style Sheet) for the sidebar:

#sidebar {
width:150px;
float:left;
padding:8px 0;
margin:0;
word-wrap: break-word; /* fix for long text breaking sidebar float in IE */
overflow: hidden; /* fix for long non-text content breaking IE sidebar float */
}

There is nothing mentioned about background. So what I did was to add a single line

background: #FFFFFF;

(#FFFFFF is the hexadecimal color code for white) to that section, so that it became:

#sidebar {
width:150px;
float:left;
padding:8px 0;
margin:0;
word-wrap: break-word; /* fix for long text breaking sidebar float in IE */
overflow: hidden; /* fix for long non-text content breaking IE sidebar float */
background: #FFFFFF;
}


BTW, instead of using hexadecimal color codes like #FFFFFF, you can also use most names of colors like red, blue, white, etc. If you want to blend the color to the colors of the site, try typing the search term "colorpic" or "iconico colorpic" into the search box above, tick ( ) Web radio button and search, and I am sure you would see the link as the first result in the SERP (search engine result page) to download a very useful tool I use to get the color code of colors on any website. (I don't want to put too many outbound links as I understand outbound links can lower your PageRank).
Read rest of entry

embed MP3 Files Into your blogspo/website

You have an MP3 file (a podcast, a song of your band, a lecture) and you want to share it with the visitors of your site. You can just put a link to the MP3 and let people download it or you can include it as an object and let the browser play it with a plug-in like QuickTime (and most of the times also crash the browser). Most people want to preview the audio and not wait until it downloads completely. You can play a partial MP3 file in audio player, but many people aren't aware of that.

But there's another away: a Flash player that allows you to pause and rewind the MP3. It's like an audio version of Google Video or YouTube, with the difference that the file is hosted on your server (or on another server). While there are many solutions based on Flash, this is the one I like the most. It's a modified version of Odeo player, that's used to play podcasts on odeo.com:


You just have to replace [MP3 file address] with the actual address.

Here you can see how it looks (in this audio, Marissa Mayer talks about innovation at Google):
Read rest of entry

create your own blogger templete

Software needed : GIMP 2.4.2
What you need: Image Hosting Server to put your image.

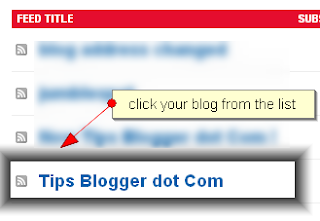
OK. This time I'll attempt to show you step by step simple template design for blogger based on my experience.

Let's start with changging your standart blogger template to "TicTac".

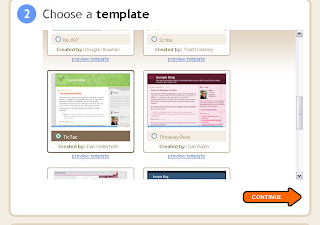
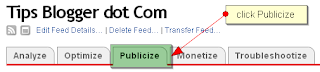
Are you done yet? if not click Continue button and we can go to the next step (Oh no.. it's gonna be a long article).

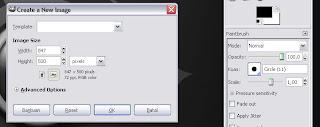
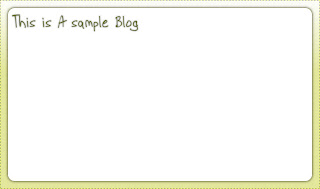
Now open your GIMP and create new image with 847 x 500 pixel image size.

Next open layer window (Goto Dialogs --> Layers) and right click background layer and chose Alpha to Selection.

In the editor window Go to Selection panel and chose Shrink and fill with 20 (pixel). Now we have a new rectangle selection area.
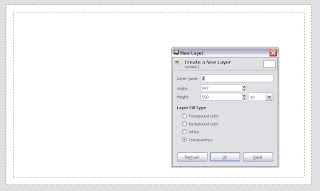
Goto Layer panel and chose New Layer named it with A and select Layer FIll Type with Transparency.


Goto Select panel and chose Rounded Rectangle and select 8. Now fill this selection with white color, in this time you will not see any diferent bicause they have the same color.

OK, to make it diferent let's give this selection a drop shadow.

Goto Filters panel --> Light and Shadow and chose Drop Shadow, Set Offset X and Offset Y to zero (0) , set Blur Radius to 10 and set Opasitas to 60. Now can you see the different?

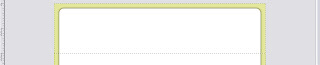
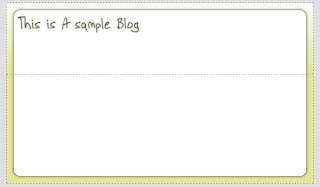
Still with rounded selected area, go to Selection panel and chose Shrink and fill with 1. We're gonna create a border for body. Now create new layer and name it with B then fill it with White color.

In the layer windows, right click on A Layer and chose 
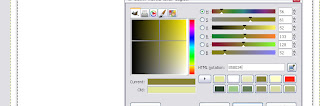
Alpha to Selection now fill this area with 858034 color


Now we have a border.

Go to Layer window and right click on Background layer then Chose Alpha to Selection, Create new layer and name it with C. Fill this layer area with e3e79b (it will be your page body color).

Next Goto Tools -> Selection Tools and chose Rectangle Select (Shortcut R). Now create selection area for header (select from upper to down -- 200 pixel height)

Go to Gradient color (Shortcut L), select FG to Transparent and set Foreground color to White, and hold CTRL then fill it from upper to down.

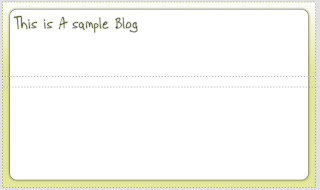
Now we have a White blended header color. Go to Layer window and right click one of the layer then select Flatten Image.

OK, now let's design our logo.

Press CTRL+SHIFT+A to clean any selection area, now select Text Tools (Shortcut T) and set your Font then Click on the header area where you wan to put your logo and write your logo.

Use Move Tools (Shortcut M) for moving the text to any position you like, and if you're done go to Layer window and right click on you logo text layer and chose Alpha to Selection.

Go to to Filters, Light and Shadow and Chose Drop Shadow. Yup.. give the text a shadow, this time set the blur radius to 5.


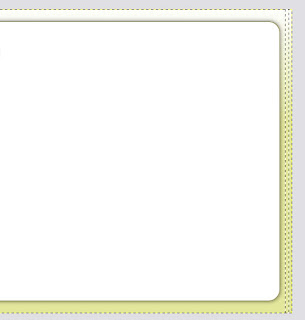
If you are follow this step by step tutorials then the result would be like those above image.
Go to Layer window, right click one of the Layer and click Flatten image now we are done with designing.

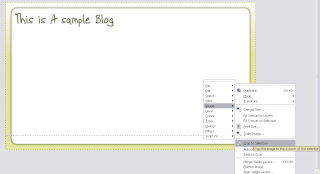
Now let's cut crop image into a several image.

First we need to duplicate our image using CTRL+D, and use Rectangle Select (Shortcut R) to select a header section (200px height) .


Right click this selection area and chose Crop to Selection in Image section. Save our new cropped image and name it with head.jpg.

Go back to master image and select in the middle area with 30px height and full width for main body background image using Rectangle Select and do the same as head image and name it with middle.jpg.


Select about 50px height and full width in the bottom area for our bottom background image and do the same as head, name it with bottom.jpg.


Crop the latest image in the side area full height and about 5px width and do like the other image, name it with side.jpg.

Upload all the 4 image to your Image Hosting server (i.e. photobucket).

Now let's go to our blogger account and select "Edit HTML" in the Template panel (You have to backup your current template before doing this step and do this step at your own risk).

Search for "http://www.blogblog.com/tictac/top_div.gif", remove the color option change it with your http://yourimagehosting/head.jpg, and add height and set it to 200px.


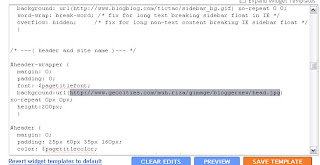
Search and remove for "background: url(http://www.blogblog.com/tictac/top_h1.gif) no-repeat bottom left;".

Search for "http://www.blogblog.com/tictac/tile.gif" and change it with http://yourhostingimage.com/middle.jpg,

Search for "http://www.blogblog.com/tictac/bottom_sash.gif" and change it with http://yourimagehosting.com/bottom.jpg,

Search and remove for "background: url(http://www.blogblog.com/tictac/bottom_sill.gif) no-repeat bottom left;", add background-color and set to #e3e79b;

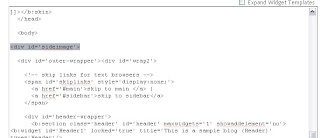
For the side image we need to create a division (div tag) before the outer-wrapper.

Search for id='outer-wrapper'
and add a div above it and set id='sideimage' (<div id='sideimage'>), next search for "<!-- end outer-wrapper -->" and add a close div (</div>) below it.


Search for "/* ---( layout structure )---*/" and write this code (Note change the image url with yours):

#sideimage {
background:#e3e79b url(http://yourhosingimage.com/side.jpg) repeat-x top;
padding:0;
margin:0;
}


Search and remove for " background: url(http://www.blogblog.com/tictac/sidebar_bg.gif) no-repeat 0 0;".

Preview and it will be look different now, but the title blog are mess up, we'll fix it.

Search for "#header h1" and add "padding:50px 0;", look above it ( padding: 25px 60px 35px 160px;) , change 160px to 40px,

Save it now, next customize your Fonts and Colors and That's it..!

Remember this just a sample background, design your own and publish it using this step.
I Hope this long post can be helpful.
Read rest of entry

how to imbeded IFR3 in blogspot

I try to write a complete steps about sIFR3 like i did to this blog followed with screenshot image on every steps. Remember, you should not implement the following steps on your main blog, create another dummy blog and make it similar enough to your main blog and make sure it's working before putting it on your main blog.

Requirement:
- sIFR3 (download here) and extract to a folder
- Fonts
- At least Macromedia Flash 8 installed on your system
- Free Hosting for sIFR3 files (Geocities or Google Page)
- A dummy blog
- A text editor (notepad++ recommended)

Preparing your font
Go to sIFR3 extracted folder, navigate to flash folder and double click on sifr.fla or edit the file using Macromedia Flash 8.


Double click on white area, and you should see text "Bold Italic Normal". Now look down on properties bar and change the font.


Save your work and then export it as a flash movie and name it the same as the font name. Now go to your hosting account and upload the exported flas file. You can use Yahoo Geocities or Google pages to host your files for free.


Edit and Upload CSS file
In this session you have to now at least basic CSS manipulating skill like padding margin colloring and other basic CSS. Now go to css folder and you should see 2 files on it that is sIFR-print.css and sIFR-screen.css.


Edit sIFR-screen.css using text editor and scroll down to "---- Header styling ---" line and add the following code bellow those line.

.sIFR-active .post-title{
visibility: hidden;
font-family: Verdana;
line-height: 1em;
padding: 10px 0 0;
}

Look a above code, ".post-title" is class name of Post Title on blogspot. If you want to set sIFR3 on another class just change the class or add another code with different class (You can set sIFR3 to multiple class name).


Upload sIFR-print.css and sIFR-screen.css to hosting server if you're done with editing (You can edit sIFR-screen.css latter directly from your hosting server).

Edit and Upload js File
Next go to js folder and you should see 1 folder and 3 js files. Edit sifr-config.js using text editor and add following code.

var newfont = {
src: 'http://files.googlepages.com/Dynasty.swf'
};

sIFR.activate(newfont);
sIFR.replace(newfont, {
selector: '.post-title'
,wmode: 'transparent'
,css: [
'.sIFR-root: { color: #333333; background-color: #f3f3f3 ;}'
,'a { text-decoration: none; }'
,'a:link { color: #0000FF; }'
,'a:hover { text-decoration: underline; }'
]
});

Change url of font (text with red color) to url of yours. Look at selector tag, this should be the same as class name on sIFR-screen.css. You can change appearance style of your sIFR on css section (text with green color).


Upload sifr.js and sifr-config.js to your hosting server when you're done with editing.

Edit Blogspot layout
Login to your blogspot account and go to Layout and then click on Edit HTML. Add the following codes on header section (Bellow <head> tag).

<!-- sIFR3 start -->
<link href='http://files.googlepages.com/sIFR-screen.css' media='screen' rel='stylesheet' type='text/css'/>
<link href='http://files.googlepages.com/sIFR-print.css' media='print' rel='stylesheet' type='text/css'/>
<script src='http://files.googlepages.com/sifr.js' type='text/javascript'/>
<script src='http://files.googlepages.com/sifr-config.js' type='text/javascript'/>
<!-- sIFR3 End -->

Change url of sIFR3 files to url of yours (text with red color), click preview to see the result (Tips: Try view your result using Firefox or IE, Opera will not give you any good result because it doesn't support sIFR). If everything is OK you can save template and repeat those steps to your main blog.


Remember to backup your main template before implementing this steps to your main blog, just in case if you have a problem with it and you can restore it in any time. One more, do not copy and paste above codes without editing the red colored text (files URL), because those are just examples, your sIFR3 will not working if you still use those URL.
Read rest of entry

putting animated favicon in blogspot

it's about changing default blogger Favicon with static icon designed with gimp. With the same way we can change this static Favicon to animated.


The code is the same with static Favicon except the ICO files is replaced with animated GIF files. You can design it your self and upload to your file server and put the GIF links to Favicon code.
<link href='http://hosting.com/url_to_your_animated.gif' rel='SHORTCUT ICON'/>
just put this green color code among the <head> tag
Read rest of entry
 

WEB CREATION Copyright © 2009 Blog is Designed by Suvanno Tharu Sponsored by Hitsweb Pvt.Ltd