What you need: Image Hosting Server to put your image.
OK. This time I'll attempt to show you step by step simple template design for blogger based on my experience.
Let's start with changging your standart blogger template to "TicTac".
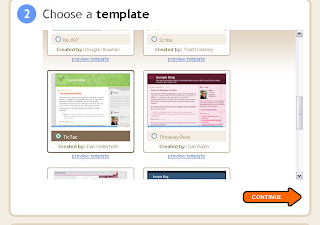 Are you done yet? if not click Continue button and we can go to the next step (Oh no.. it's gonna be a long article).
Now open your GIMP and create new image with 847 x 500 pixel image size.
 Next open layer window (Goto Dialogs --> Layers) and right click background layer and chose Alpha to Selection.
In the editor window Go to Selection panel and chose Shrink and fill with 20 (pixel). Now we have a new rectangle selection area.
Goto Layer panel and chose New Layer named it with A and select Layer FIll Type with Transparency.
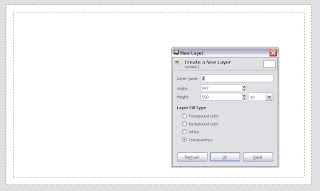
Goto Select panel and chose Rounded Rectangle and select 8. Now fill this selection with white color, in this time you will not see any diferent bicause they have the same color.
OK, to make it diferent let's give this selection a drop shadow.
Goto Filters panel --> Light and Shadow and chose Drop Shadow, Set Offset X and Offset Y to zero (0) , set Blur Radius to 10 and set Opasitas to 60. Now can you see the different?
Still with rounded selected area, go to Selection panel and chose Shrink and fill with 1. We're gonna create a border for body. Now create new layer and name it with B then fill it with White color.
In the layer windows, right click on A Layer and chose Alpha to Selection now fill this area with 858034 color

Now we have a border.
Go to Layer window and right click on Background layer then Chose Alpha to Selection, Create new layer and name it with C. Fill this layer area with e3e79b (it will be your page body color).
Next Goto Tools -> Selection Tools and chose Rectangle Select (Shortcut R). Now create selection area for header (select from upper to down -- 200 pixel height)
 Go to Gradient color (Shortcut L), select FG to Transparent and set Foreground color to White, and hold CTRL then fill it from upper to down.
Now we have a White blended header color. Go to Layer window and right click one of the layer then select Flatten Image.
OK, now let's design our logo.
Press CTRL+SHIFT+A to clean any selection area, now select Text Tools (Shortcut T) and set your Font then Click on the header area where you wan to put your logo and write your logo.
Use Move Tools (Shortcut M) for moving the text to any position you like, and if you're done go to Layer window and right click on you logo text layer and chose Alpha to Selection.
Go to to Filters, Light and Shadow and Chose Drop Shadow. Yup.. give the text a shadow, this time set the blur radius to 5.

If you are follow this step by step tutorials then the result would be like those above image.
Go to Layer window, right click one of the Layer and click Flatten image now we are done with designing.
Now let's cut crop image into a several image.
First we need to duplicate our image using CTRL+D, and use Rectangle Select (Shortcut R) to select a header section (200px height) .
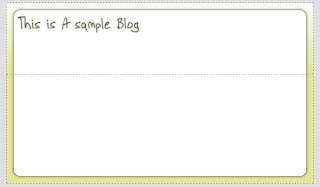
Right click this selection area and chose Crop to Selection in Image section. Save our new cropped image and name it with head.jpg.
Go back to master image and select in the middle area with 30px height and full width for main body background image using Rectangle Select and do the same as head image and name it with middle.jpg.
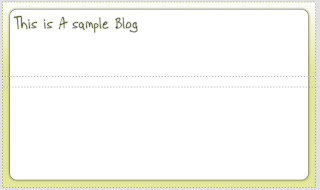
Select about 50px height and full width in the bottom area for our bottom background image and do the same as head, name it with bottom.jpg.

Crop the latest image in the side area full height and about 5px width and do like the other image, name it with side.jpg.
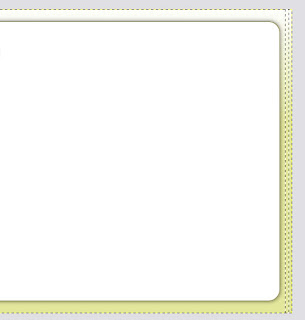 Upload all the 4 image to your Image Hosting server (i.e. photobucket).
Now let's go to our blogger account and select "Edit HTML" in the Template panel (You have to backup your current template before doing this step and do this step at your own risk).
Search for "http://www.blogblog.com/tictac/top_div.gif", remove the color option change it with your http://yourimagehosting/head.jpg, and add height and set it to 200px.
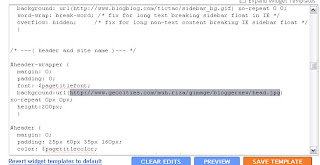
Search and remove for "background: url(http://www.blogblog.com/tictac/top_h1.gif) no-repeat bottom left;".
Search for "http://www.blogblog.com/tictac/tile.gif" and change it with http://yourhostingimage.com/middle.jpg,
Search for "http://www.blogblog.com/tictac/bottom_sash.gif" and change it with http://yourimagehosting.com/bottom.jpg,
Search and remove for "background: url(http://www.blogblog.com/tictac/bottom_sill.gif) no-repeat bottom left;", add background-color and set to #e3e79b;
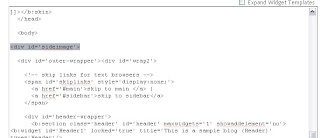
For the side image we need to create a division (div tag) before the outer-wrapper.
Search for id='outer-wrapper' and add a div above it and set id='sideimage' (<div id='sideimage'>), next search for "<!-- end outer-wrapper -->" and add a close div (</div>) below it.
Search for "/* ---( layout structure )---*/" and write this code (Note change the image url with yours):
#sideimage {
background:#e3e79b url(http://yourhosingimage.com/side.jpg) repeat-x top;
padding:0;
margin:0;
}
Search and remove for " background: url(http://www.blogblog.com/tictac/sidebar_bg.gif) no-repeat 0 0;".
Preview and it will be look different now, but the title blog are mess up, we'll fix it.
Search for "#header h1" and add "padding:50px 0;", look above it ( padding: 25px 60px 35px 160px;) , change 160px to 40px,
Save it now, next customize your Fonts and Colors and That's it..!
Remember this just a sample background, design your own and publish it using this step.
I Hope this long post can be helpful.
0 comments:
Post a Comment